My Secret Recipe Club blog for August is A Vegan Obsession. The recipes on this blog are both vegan and gluten-free, which is pretty much the complete opposite of how I cook. Fortunately, there were some side dishes and snacks to choose from, and I found a great 3-ingredient recipe for a delicious, different, healthy snack: Roasted Chickpeas.
ROASTED GARBANZOS
1 15-ounce can garbanzo beans (chickpeas), drained and rinsed
coarse salt
garlic-pepper seasoning
Use a kitchen towel or paper towels to dry the garbanzos. Spread them on a cookie sheet (I covered it in foil) and season generously.
Here's how they looked before cooking. You could probably fit 2 cans' worth on a large cookie sheet. I had lots of room to spread them out.
Bake at 400 for at least 20 minutes, opening the door and shaking the pan 2 or 3 times during baking to move the garbanzos around.
They'll cool off quickly and be ready to eat! These are crunchy and tasty, and a good lowfat snack. Or you could smack them once or twice with your meat mallet and sprinkle them over a salad.
I like to call these "garbanzos" because that's just more fun to say. I didn't change much from the original except my use of seasoning; the original recipe called for "herbsalt" and ground black pepper.
This makes about 3/4 cup when cooked, so if you're planning to serve these to a crowd, you'll need to make several cans of beans.
Enjoy this unusual, crunchy, and frugal snack!
Don't forget to "like" my new facebook page: Mom's Fridge: Recipes.
Monday, August 15, 2011
Sunday, August 14, 2011
Secret Recipe Club
I don't believe in secret recipes. In my opinion, recipes are meant to be shared. When someone asks me for a recipe for a food I've served them, I take that as a huge compliment.
I remember when I used to help out at Bingo at my older son's school. I worked in the kitchen, cooking hot dogs and making coffee. There was an older lady who would show up at Bingo every Sunday with an amazing-looking chocolate cake. As soon as people saw her, they'd line up at the window, waiting for a slice.
People always wanted her recipe, and she would never share it. She said that she wouldn't even give this recipe to her own kids. What a shame!
The Secret Recipe Club is not about people who keep their recipes secret. Instead, it's a chance for bloggers to SECRETLY visit a food blog, prepare a recipe, and report back. Then, all at the same time, we post about it on our blogs. Only then do we find out who picked a recipe from our blog--and which one!
It's lots of fun. And tomorrow's the first of three Big Reveals for the month of August--this group has gotten so big that it had to be broken into three. Check back tomorrow to see whose recipe I chose. Until then--shhh! It's a secret!
I remember when I used to help out at Bingo at my older son's school. I worked in the kitchen, cooking hot dogs and making coffee. There was an older lady who would show up at Bingo every Sunday with an amazing-looking chocolate cake. As soon as people saw her, they'd line up at the window, waiting for a slice.
People always wanted her recipe, and she would never share it. She said that she wouldn't even give this recipe to her own kids. What a shame!
The Secret Recipe Club is not about people who keep their recipes secret. Instead, it's a chance for bloggers to SECRETLY visit a food blog, prepare a recipe, and report back. Then, all at the same time, we post about it on our blogs. Only then do we find out who picked a recipe from our blog--and which one!
It's lots of fun. And tomorrow's the first of three Big Reveals for the month of August--this group has gotten so big that it had to be broken into three. Check back tomorrow to see whose recipe I chose. Until then--shhh! It's a secret!
Saturday, August 13, 2011
On the Menu: August 1 - 13, 2011
You can tell it's summer around here when in a 2-week period, we have pizza twice and takeout once! Every so often, the cook (that's me!) needs a day off too.
Mon 1: pizza
Tues 2: Pie pan enchiladas, salad
Wed 3: Roast chicken, rice, broccoli
Thurs 4: Asian chicken wraps, brown rice
Fri 5: takeout
Sat 6: Steak on the grill, crispy smashed potatoes, corn. The potato dish was a new recipe and received a BIG thumbs-up. You get baked-potato flavor, but they're not all dried out.
Sun 7: Tandoori chicken, Alfredo noodles, mixed vegetables
Mon 8: Gyros, pasta salad, cucumbers
Tues 9: Cheddar garlic chicken (now with pictures!), sweet potato fries, broccoli
Wed 10: Spaghetti with meatballs
Thurs 11: Beef noodle skillet, corn
Fri 12: Pizza
Sat 13: Chicken piccata bites, rice, broccoli
| Asian chicken wraps. YUM! |
Mon 1: pizza
Tues 2: Pie pan enchiladas, salad
Wed 3: Roast chicken, rice, broccoli
Thurs 4: Asian chicken wraps, brown rice
Fri 5: takeout
Sat 6: Steak on the grill, crispy smashed potatoes, corn. The potato dish was a new recipe and received a BIG thumbs-up. You get baked-potato flavor, but they're not all dried out.
Sun 7: Tandoori chicken, Alfredo noodles, mixed vegetables
Mon 8: Gyros, pasta salad, cucumbers
Tues 9: Cheddar garlic chicken (now with pictures!), sweet potato fries, broccoli
Wed 10: Spaghetti with meatballs
Thurs 11: Beef noodle skillet, corn
Fri 12: Pizza
Sat 13: Chicken piccata bites, rice, broccoli
Wednesday, August 10, 2011
Waste Not, Want Not: Citrus
Tell me I'm not the only one who buys a bunch of lemons or limes because they are sold in a bag or sold "8 for a low, low price," uses four of them and then lets the rest molder in the fruit drawer of the fridge.
Today I rummaged around in the fruit drawer and found 4 lemons and 4 limes hanging around in there. The limes were starting to turn yellow, and I knew that brown and icky were just days away, so I decided to head them off at the pass.
I squeezed the limes and then poured the juice into ice-cube trays. Into the freezer they went, and then I did the same with the lemons.
The juice of one lime made 3 ice cubes; one lemon made 2. That may be due to differences in the size of my ancient ice-cube trays (I have about 8 of them in random sizes).
When they're completely frozen I'll transfer them to labeled freezer bags.
This would also work with orange juice.
Today I rummaged around in the fruit drawer and found 4 lemons and 4 limes hanging around in there. The limes were starting to turn yellow, and I knew that brown and icky were just days away, so I decided to head them off at the pass.
I squeezed the limes and then poured the juice into ice-cube trays. Into the freezer they went, and then I did the same with the lemons.
The juice of one lime made 3 ice cubes; one lemon made 2. That may be due to differences in the size of my ancient ice-cube trays (I have about 8 of them in random sizes).
When they're completely frozen I'll transfer them to labeled freezer bags.
This would also work with orange juice.
Thursday, August 04, 2011
Spicy Asian Chicken Wraps
I saw this recipe at Barbara's cooking blog and thought it would be something my family would enjoy. On the way to the supermarket today, though, I heard a news story on the radio about salmonella in ground turkey, so I decided to revamp the recipe. Instead, I used slices of boneless, skinless chicken breast. The cooking technique is changed a bit to reflect the change in ingredients. Next time I make this, I won't change a thing: we loved this! (Plus, the chicken was on sale!)
Spicy Asian Chicken Wraps
Get the recipe and nutrition facts at Cook and Count!
Spicy Asian Chicken Wraps
Get the recipe and nutrition facts at Cook and Count!
Tuesday, August 02, 2011
Menu Plan end of July 2011
Just catching up...
Mon 25: Lemon Mushroom Herb Chicken
Tues 26: Pot roast
Wed 27: Spaghetti
Thurs 28: Shrimp Tacos
Fri 29: ate out
Sat 30: family picnic
Sun 31: neighborhood picnic
Mon 25: Lemon Mushroom Herb Chicken
Tues 26: Pot roast
Wed 27: Spaghetti
Thurs 28: Shrimp Tacos
Fri 29: ate out
Sat 30: family picnic
Sun 31: neighborhood picnic
Sunday, July 24, 2011
Menu Plan July 16-24, 2011
Saturday 16: French bread pizza with meatballs
Sunday 17: picnic for our church folk group: burgers, hot dogs, Dr. Pepper baked beans, corn relish, pasta salad, homemade sauerkraut
Monday 18: BBQ chicken in the slow cooker
Tuesday 19: chicken & dumplings
Wednesday 20: spaghetti
Thursday 21: combo tacos
Friday 22: not home
Saturday 23: burgers
Sunday 24: Mexican steak on the grill, Mini Farfalle
Sunday 17: picnic for our church folk group: burgers, hot dogs, Dr. Pepper baked beans, corn relish, pasta salad, homemade sauerkraut
Monday 18: BBQ chicken in the slow cooker
Tuesday 19: chicken & dumplings
Wednesday 20: spaghetti
Thursday 21: combo tacos
Friday 22: not home
Saturday 23: burgers
Sunday 24: Mexican steak on the grill, Mini Farfalle
Mini Farfalle with Garlic and Onions
Here's a twist on a side dish I usually make with orzo. I was all set to make it tonight, and had already defrosted the chicken broth, when I discovered that I didn't have any orzo. So I improvised--and it was good!
1 small onion, chopped fine
2 tsp minced garlic
2 tbl olive oil
2 cups chicken broth
1/2 tsp dried thyme
2 cups mini bow-tie pasta
1 cup frozen peas
1/2 cup Parmesan cheese
Saute the onion and garlic in the olive oil. When everything is soft, add the broth and thyme. Bring to a boil. Add pasta and peas, bring to a boil, then turn down to simmer and cover. Simmer 20 minutes. Stir in cheese and serve immediately.
1 small onion, chopped fine
2 tsp minced garlic
2 tbl olive oil
2 cups chicken broth
1/2 tsp dried thyme
2 cups mini bow-tie pasta
1 cup frozen peas
1/2 cup Parmesan cheese
Saute the onion and garlic in the olive oil. When everything is soft, add the broth and thyme. Bring to a boil. Add pasta and peas, bring to a boil, then turn down to simmer and cover. Simmer 20 minutes. Stir in cheese and serve immediately.
Thursday, July 21, 2011
Combo Tacos
Kind of a taco, kind of a burrito...very delicious.
INGREDIENTS
1 can refried beans, heated
1 can Rotel (I used the lime & cilantro flavor)
1 lb. ground beef, browned & drained
1 small onion, chopped fine
10 flour tortillas
1 1/2 cups shredded cheese (Cheddar, Jack or a blend)
1 TBL adobo (if without pepper, add 1/2 tsp pepper)
After browning ground beef, saute the onions in the same pan until slightly caramelized. Return ground beef to pan and add Rotel and adobo. Simmer 10 minutes.
Serve on warmed tortillas with refried beans and cheese.
INGREDIENTS
1 can refried beans, heated
1 can Rotel (I used the lime & cilantro flavor)
1 lb. ground beef, browned & drained
1 small onion, chopped fine
10 flour tortillas
1 1/2 cups shredded cheese (Cheddar, Jack or a blend)
1 TBL adobo (if without pepper, add 1/2 tsp pepper)
After browning ground beef, saute the onions in the same pan until slightly caramelized. Return ground beef to pan and add Rotel and adobo. Simmer 10 minutes.
Serve on warmed tortillas with refried beans and cheese.
Monday, July 18, 2011
Secret Recipe Club: Cucumber Salad
It's time again for the Secret Recipe Club, where you visit a cooking blog, try one of their recipes, and report back. No one knows who tried their recipe until they see the posts today.
This cucumber salad makes a nice simple side dish that's great for lunch or dinner in the summertime! You don't get a huge amount, so if you're feeding a bunch or having a picnic, just increase the recipe.
Birthe's a wonderful photographer and the illustrations that accompany her recipes are amazing. New Yorker By Heart has many grilling recipes and also homemade pizza recipes! If I'd been sent to this blog at a colder time of year, I'd have chosen a pizza to try.
CUCUMBER SALAD from New Yorker By Heart
1 cucumber
2 TBL rice wine vinegar
2 TBL cider vinegar
1 tsp coarse salt
freshly ground pepper to taste
2 1/2 tsp sugar
(ADDED a few sprigs of garden-fresh dill)
Slice cucumber down the middle. Scoop out the seeds. Slice each half into 4 strips and then chop into small pieces.
Mix remaining ingredients (except dill) and pour over cucumber in small bowl.
Stir.
Add dill sprigs and refrigerate a few hours until ready to serve.
Here's how to scoop the seeds out of the cucumber: a melon baller works great! As you can see, I had a little helper.
This blog is originally in Danish, which made things a challenge. I was thrilled to discover that the Google Chrome browser (which I use) automatically translates--but as a former language teacher I know that not all online translation works. I did guess at one ingredient in this recipe as it did not translate: risvinseddike which I am assuming is rice wine vinegar.
Some of the translation was funny--a few recipes called for items to be "executed" in the oven. Bake? Broil? Roast? I wasn't sure, so I kept to a simple recipe that I didn't think I'd lose in the translation.
This cucumber salad makes a nice simple side dish that's great for lunch or dinner in the summertime! You don't get a huge amount, so if you're feeding a bunch or having a picnic, just increase the recipe.
Birthe's a wonderful photographer and the illustrations that accompany her recipes are amazing. New Yorker By Heart has many grilling recipes and also homemade pizza recipes! If I'd been sent to this blog at a colder time of year, I'd have chosen a pizza to try.
CUCUMBER SALAD from New Yorker By Heart
1 cucumber
2 TBL rice wine vinegar
2 TBL cider vinegar
1 tsp coarse salt
freshly ground pepper to taste
2 1/2 tsp sugar
(ADDED a few sprigs of garden-fresh dill)
Slice cucumber down the middle. Scoop out the seeds. Slice each half into 4 strips and then chop into small pieces.
Mix remaining ingredients (except dill) and pour over cucumber in small bowl.
Stir.
Add dill sprigs and refrigerate a few hours until ready to serve.
Here's how to scoop the seeds out of the cucumber: a melon baller works great! As you can see, I had a little helper.
This blog is originally in Danish, which made things a challenge. I was thrilled to discover that the Google Chrome browser (which I use) automatically translates--but as a former language teacher I know that not all online translation works. I did guess at one ingredient in this recipe as it did not translate: risvinseddike which I am assuming is rice wine vinegar.
Some of the translation was funny--a few recipes called for items to be "executed" in the oven. Bake? Broil? Roast? I wasn't sure, so I kept to a simple recipe that I didn't think I'd lose in the translation.
Friday, July 15, 2011
Menu Plan first half of July 2011
Is it a menu plan if you post it after the fact? It's summer, and I've gotten more "fly by night" about menu planning, especially since attendance at dinner is sporadic as far as my 2 teens are concerned. Very often I wind up changing the plan 3 or 4 times by the time 6:00 rolls around!
FRIDAY 1: Shrimp scampi with pasta (now with pictures!)
SATURDAY 2: Grilled chicken
SUNDAY 3: Waffles
MONDAY 4: Grilled steak
TUESDAY 5: Carnitas
WEDNESDAY 6: Maple-dijon chicken
THURSDAY 7: Spaghetti
FRIDAY 8: Homemade pizza (using the same dough as Calzones)
SATURDAY 9: Burgers
SUNDAY 10: not home
MONDAY 11: Chicken piccata bites (now with pictures!)
TUESDAY 12: not home
WEDNESDAY 13: Beef noodle skillet
THURSDAY 14: ate at the diner
FRIDAY 15: Italian veal stew (now with pictures!)
FRIDAY 1: Shrimp scampi with pasta (now with pictures!)
SATURDAY 2: Grilled chicken
SUNDAY 3: Waffles
MONDAY 4: Grilled steak
TUESDAY 5: Carnitas
WEDNESDAY 6: Maple-dijon chicken
THURSDAY 7: Spaghetti
FRIDAY 8: Homemade pizza (using the same dough as Calzones)
SATURDAY 9: Burgers
SUNDAY 10: not home
MONDAY 11: Chicken piccata bites (now with pictures!)
TUESDAY 12: not home
WEDNESDAY 13: Beef noodle skillet
THURSDAY 14: ate at the diner
FRIDAY 15: Italian veal stew (now with pictures!)
Wednesday, July 13, 2011
The Cleaner Picker-Upper
Today I figured out a way to drain ground beef without making a huge mess and accidentally pouring grease down the sink (a BIG no-no if you don't want your drainpipes clogged).
My dirty-dish pile included a small skillet that someone had used to fry an egg for breakfast. I lined it with 3 or 4 paper towels, then placed a colander inside.
Then I poured the cooked ground beef out of the big skillet and into the colander.
All the grease drained onto the towels below.
Sorry for that last shot--I know it's gross, but I wanted to show that there were NO spills. I just carried the skillet with the towels right to the trash and dumped them in. No mess and nothing down the drain.
My dirty-dish pile included a small skillet that someone had used to fry an egg for breakfast. I lined it with 3 or 4 paper towels, then placed a colander inside.
Then I poured the cooked ground beef out of the big skillet and into the colander.
All the grease drained onto the towels below.
Sorry for that last shot--I know it's gross, but I wanted to show that there were NO spills. I just carried the skillet with the towels right to the trash and dumped them in. No mess and nothing down the drain.
Saturday, July 09, 2011
Proof
...that not everyone lives by the Pantry Principle.
Little Brother's friend is visiting for a sleepover. I just sent them off to bed and reminded them to brush their teeth.
"I don't have a toothbrush," our visitor replied.
"I can fix that," I told him, and pulled a box out of the linen closet that had 5 or 6 new toothbrushes and a few tubes of toothpaste in it.
Wide-eyed, he asked me, "Are you a dentist?"
Nope. And I'm not an Extreme Couponer either. But I like to keep a few extras of life's little necessities around for times like these--when visitors don't remember to bring a toothbrush.
Little Brother's friend is visiting for a sleepover. I just sent them off to bed and reminded them to brush their teeth.
"I don't have a toothbrush," our visitor replied.
"I can fix that," I told him, and pulled a box out of the linen closet that had 5 or 6 new toothbrushes and a few tubes of toothpaste in it.
Wide-eyed, he asked me, "Are you a dentist?"
Nope. And I'm not an Extreme Couponer either. But I like to keep a few extras of life's little necessities around for times like these--when visitors don't remember to bring a toothbrush.
Wednesday, July 06, 2011
Calzones
Everyone in my family likes calzones, but I haven't had the greatest success making them at home. I had high hopes, though, when I bookmarked the recipe for Buffalo Chicken Calzones over at Once a Month Mom.
Since I don't like Buffalo chicken, I decided to make some of my calzones with barbecue chicken. These wound up being the ones everyone loved.
The next time, I filled the calzones with mozzarella cheese and sliced meatballs. Once again, this was a hit! (The pictures are from the meatball batch, but the technique is the same.)
BARBECUED CHICKEN FILLING
2 cups cooked chicken, shredded
1 cup Cheddar or Cheddar-Jack cheese, shredded
1 medium onion, caramelized
1 cup barbecue sauce
MEATBALL FILLING
10 to 12 meatballs, sliced (1 per calzone)
1 cup spaghetti sauce
1 cup mozzarella cheese
HOMEMADE PIZZA DOUGH from Once a Month Mom
15 ounces warm water
1 TBL active dry yeast
1 TBL sugar
2 1/2 tsp kosher salt
2 TBL olive oil
3 1/4 cups all-purpose flour
This is the easiest pizza dough ever! Just mix yeast, sugar, salt and olive oil with the warm water in a large bowl. Mix in the flour with a wooden spoon. No kneading necessary. The dough will not look or feel like a kneaded bread dough, but don't worry! Cover with a towel and let it rest at room temperature for about 2 hours. (In summer, if I have the air conditioner on, I take the covered bread bowl out to the porch to rise the dough.)
Roll out the dough on a floured surface and divide it into 10 to 12 portions for calzones.
TO BAKE: Place finished calzones on cookie sheet (I cover the sheet in parchment paper.) Brush tops of calzones with olive oil. Sprinkle with parmesan cheese if desired. Bake in preheated 450-degree oven for 15 to 20 minutes.
Print this recipe!
1 cup Cheddar or Cheddar-Jack cheese, shredded
1 medium onion, caramelized
1 cup barbecue sauce
MEATBALL FILLING
10 to 12 meatballs, sliced (1 per calzone)
1 cup spaghetti sauce
1 cup mozzarella cheese
| One sliced meatball per calzone. |
| Top with cheese (the kids want me to add more next time!) |
| Crimp it tightly so the filling doesn't leak out! |
HOMEMADE PIZZA DOUGH from Once a Month Mom
15 ounces warm water
1 TBL active dry yeast
1 TBL sugar
2 1/2 tsp kosher salt
2 TBL olive oil
3 1/4 cups all-purpose flour
This is the easiest pizza dough ever! Just mix yeast, sugar, salt and olive oil with the warm water in a large bowl. Mix in the flour with a wooden spoon. No kneading necessary. The dough will not look or feel like a kneaded bread dough, but don't worry! Cover with a towel and let it rest at room temperature for about 2 hours. (In summer, if I have the air conditioner on, I take the covered bread bowl out to the porch to rise the dough.)
Roll out the dough on a floured surface and divide it into 10 to 12 portions for calzones.
| Calzone dough immediately after mixing. |
| 2 hours later, here's the dough after rising! |
TO BAKE: Place finished calzones on cookie sheet (I cover the sheet in parchment paper.) Brush tops of calzones with olive oil. Sprinkle with parmesan cheese if desired. Bake in preheated 450-degree oven for 15 to 20 minutes.
Print this recipe!
Saturday, July 02, 2011
Now with Pictures!!
I'm not the finest photographer in the world, but I do love to see photos of a finished dish (and sometimes, photos of work in progress helps me make sense of the steps.)
So, since I like that feature in other people's blogs, I've been trying to include it in my own.
Last night I made Shrimp Scampi with Linguine and photographed that before we dug in.
Are you hungry yet? (Yes, I added the photo to my recipe post, but I put it here to whet your appetite.) I'd eat this again today, but we're out of shrimp now.
I admit that the photo-adding idea is not my own; Kristen at Frugal Antics of a Harried Homemaker has been working on this project, and her determination has inspired me to fill in my own recipe-photo gaps. Thanks, Kristen!
So, since I like that feature in other people's blogs, I've been trying to include it in my own.
Last night I made Shrimp Scampi with Linguine and photographed that before we dug in.
Are you hungry yet? (Yes, I added the photo to my recipe post, but I put it here to whet your appetite.) I'd eat this again today, but we're out of shrimp now.
I admit that the photo-adding idea is not my own; Kristen at Frugal Antics of a Harried Homemaker has been working on this project, and her determination has inspired me to fill in my own recipe-photo gaps. Thanks, Kristen!
Sunday, June 19, 2011
Val's Lemon Mushroom Herb Chicken
One of my friends from the Family Corner forums invented this recipe. I make enough of the flour mixture to do about 5 batches of the chicken, and just keep it in a jar. You only need 1/3 to 1/2 cup of the mix per batch. Here's the recipe with my changes.
Find the recipe and nutrition information at Cook and Count!
June 2011 Menu Plan
May 30: Memorial Day: burgers and hot dogs on the grill, pasta salad
May 31: Chicken pitas
June 1: Calzones. I made Buffalo Chicken and Barbecue Chicken with Caramelized Onions. The barbecue was the biggest hit.
June 2: Spaghetti
June 3: Shrimp tacos
June 4: Fajitas
June 5: Hoagies
June 6: Lemon Mushroom Herb Chicken
June 7: Shredded Chicken Tacos (these tasted great--but were very drippy. I want to find another way to use the meat from this dish.)
June 8: Takeout
June 9: Spaghetti
June 10: Shrimp tacos (again! By popular demand! Yes, it is that good)
June 11: Not home
June 12: Not home
June 13: Beef Skillet
June 14: Balsamic chicken with thyme (now with picture!)
June 15: Tacos
June 16: Ravioli with marinara
June 17: Carnival
June 18: Chicken on the grill
June 19: Ate out for Father's Day
June 20: Chicken barley soup
June 21: Chicken francese
June 22: Cheesesteak sloppy joes
June 23: Meatball calzones (using the Once a Month Mom pizza dough)
June 24: pizza
June 25: at a family party
June 26: Chicken piccata bites, farfalle with mixed vegetables
June 27: ate out
June 28: Hawaiian chicken, rice, green beans with almonds
June 29: ate out
June 30: Chicken Pitas. I discovered that you can make this in a skillet just as easily as you can on a griddle pan--but any spatters are much better contained. So there were no "grill marks." So what? As soon as you fold the pita, you don't see any grill marks anyway. I'm all about keeping it easy AND delicious.
May 31: Chicken pitas
June 1: Calzones. I made Buffalo Chicken and Barbecue Chicken with Caramelized Onions. The barbecue was the biggest hit.
June 2: Spaghetti
June 3: Shrimp tacos
June 4: Fajitas
June 5: Hoagies
June 6: Lemon Mushroom Herb Chicken
June 7: Shredded Chicken Tacos (these tasted great--but were very drippy. I want to find another way to use the meat from this dish.)
June 8: Takeout
June 9: Spaghetti
June 10: Shrimp tacos (again! By popular demand! Yes, it is that good)
June 11: Not home
June 12: Not home
June 13: Beef Skillet
June 14: Balsamic chicken with thyme (now with picture!)
June 15: Tacos
June 16: Ravioli with marinara
June 17: Carnival
June 18: Chicken on the grill
June 19: Ate out for Father's Day
June 20: Chicken barley soup
June 21: Chicken francese
June 22: Cheesesteak sloppy joes
June 23: Meatball calzones (using the Once a Month Mom pizza dough)
June 24: pizza
June 25: at a family party
June 26: Chicken piccata bites, farfalle with mixed vegetables
June 27: ate out
June 28: Hawaiian chicken, rice, green beans with almonds
June 29: ate out
June 30: Chicken Pitas. I discovered that you can make this in a skillet just as easily as you can on a griddle pan--but any spatters are much better contained. So there were no "grill marks." So what? As soon as you fold the pita, you don't see any grill marks anyway. I'm all about keeping it easy AND delicious.
Tuesday, June 14, 2011
Oreo-Stuffed Chocolate-Chip Cookies
One of the big hits at the cast-and-crew Tech Week dinners that the parents hosted at my daughter's high school this year was a plate of Oreo-stuffed chocolate-chip cookies that appeared every night. No one could figure out who brought it--and we all wanted the recipe. Only a lucky few kids even got to taste those cookies, because the platter was emptied in a flash every single night.
I found the original recipe at Picky Palate, but I wanted to make a few changes. First of all, I saw how huge those cookies were. I figured a mini Oreo would be easier to work with and would result in a smaller cookie. Also, I have my own favorite chocolate-chip cookie recipe, so I used that for the dough.
Here's the procedure:
1. Refrigerate your cookie dough for at least an hour before starting.
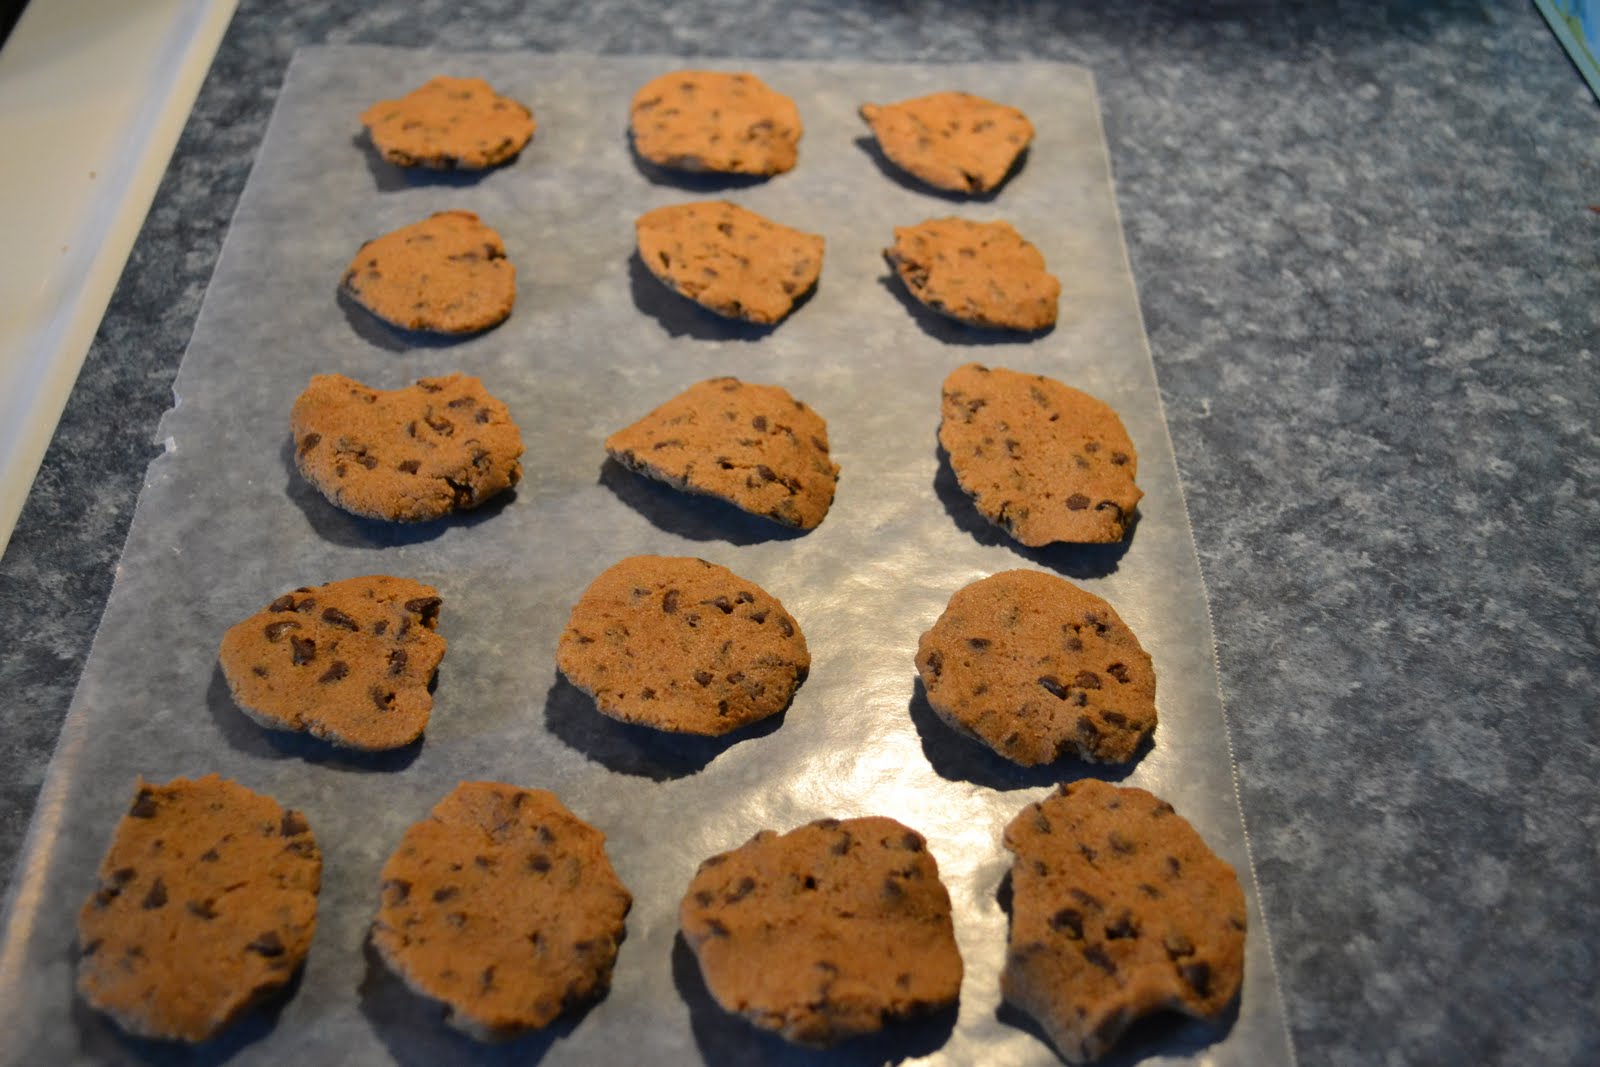
2. Use a teaspoon to remove balls of dough. Flatten on a sheet of waxed paper.
3. Place a mini Oreo on half the flattened disks of dough.
4. Place another disk on top of the disk with the Oreo, then carefully mold the dough around the cookie so no Oreo is showing. (Pardon the poor photo; I was baking with one hand and photographing with the other since the kids weren't home to help me!)
5. Place on baking sheet (I like to line my baking sheets with a silicone liner). Bake about 1 minute longer than you usually would for chocolate-chip cookies. Your mileage may vary, but this timing worked for me.
6. Cool on wire rack before enjoying them!
Thanks again for the inspiration, Picky Palate!
I found the original recipe at Picky Palate, but I wanted to make a few changes. First of all, I saw how huge those cookies were. I figured a mini Oreo would be easier to work with and would result in a smaller cookie. Also, I have my own favorite chocolate-chip cookie recipe, so I used that for the dough.
Here's the procedure:
1. Refrigerate your cookie dough for at least an hour before starting.
2. Use a teaspoon to remove balls of dough. Flatten on a sheet of waxed paper.
3. Place a mini Oreo on half the flattened disks of dough.
4. Place another disk on top of the disk with the Oreo, then carefully mold the dough around the cookie so no Oreo is showing. (Pardon the poor photo; I was baking with one hand and photographing with the other since the kids weren't home to help me!)
5. Place on baking sheet (I like to line my baking sheets with a silicone liner). Bake about 1 minute longer than you usually would for chocolate-chip cookies. Your mileage may vary, but this timing worked for me.
6. Cool on wire rack before enjoying them!
Thanks again for the inspiration, Picky Palate!
My Favorite Chocolate-Chip Cookies
One of my friends brought a plate of these cookies to some event or other. We all praised her baking and she let us know that her husband had made them. We have since designated Bob the Official Baker for all our events. (I don't think he minds. He feeds us cookies; we feed his ego. Everyone's happy.)
Big Brother likes these cookies so much that he once told me that he'd be willing to steal Bob's recipe box so I could get the recipe. Bob thought that was funny and offered me the recipe. No one had to break into Bob's kitchen to get it.

Big Brother likes these cookies so much that he once told me that he'd be willing to steal Bob's recipe box so I could get the recipe. Bob thought that was funny and offered me the recipe. No one had to break into Bob's kitchen to get it.
These are a little different from your everyday chocolate-chip cookies since there's a touch of cinnamon in them. They're delicious--and addictive. Here's the recipe:
BOB'S CHOCOLATE-CHIP COOKIES
3/4 cup butter (1 1/2 sticks), softened (in summer 15 minutes at room temp is plenty. Do not melt or heat the butter)
1/2 cup sugar
1 cup brown sugar
1 tsp vanilla extract
1 egg, beaten
1 1/2 cups flour
1 1/2 tsp cinnamon (I've been known to add up to 2 tsp)
1/4 tsp salt
1/2 tsp baking soda
1 package chocolate chips, whatever kind you like best (I like mini chips in these, but any kind works)
Cream butter, sugars, vanilla and egg with electric mixer until light and fluffy. Add dry ingredients, excluding chips. Stir in chips by hand or use the mixer on very low speed. If dough is very soft, chill for a little while before baking to make it easier to handle.
Roll 1 tsp-sized balls and place on baking sheet. Bake 9 minutes at 375. Cool on a wire rack. Makes 6 to 7 dozen.

Monday, June 13, 2011
Secret Recipe Club: Shrimp Tacos
I could get carried away trying new desserts, thanks to the Secret Recipe Club, but I decided that when possible I'd make a new-to-me main dish recipe instead. We don't eat dessert very often (except for ice cream) and we do eat dinner every single night.
This recipe turned out to be great for those nights when it's just too hot to cook--because there's only 5 minutes of cook time involved!
My assigned blog this month was Every Little Thing. This blog emphasizes the use of fresh ingredients, and it's full of photos that will make you drool! Stacy's recipe for Shrimp Tacos was truly simple to make and everybody here loved it! In fact, we had it twice in two weeks--by popular demand :)
I doubled the original shrimp recipe to feed my crew and used a different salsa recipe, so here it is as I made it:
SHRIMP TACOS
Get the recipe and nutrition facts at Cook and Count.
MY OWN PICO DE GALLO
Get the recipe and nutrition facts at Cook and Count.
Join the club! It's lots of fun. And visit the other participating Secret Recipe Club blogs:
This recipe turned out to be great for those nights when it's just too hot to cook--because there's only 5 minutes of cook time involved!
My assigned blog this month was Every Little Thing. This blog emphasizes the use of fresh ingredients, and it's full of photos that will make you drool! Stacy's recipe for Shrimp Tacos was truly simple to make and everybody here loved it! In fact, we had it twice in two weeks--by popular demand :)
I doubled the original shrimp recipe to feed my crew and used a different salsa recipe, so here it is as I made it:
SHRIMP TACOS
Get the recipe and nutrition facts at Cook and Count.
MY OWN PICO DE GALLO
Get the recipe and nutrition facts at Cook and Count.
Join the club! It's lots of fun. And visit the other participating Secret Recipe Club blogs:
Subscribe to:
Posts (Atom)