Saturday, November 16, 2013

Maple-Walnut Cupcakes

Excuse the slightly-lumpy icing--I should have poured
the sugar more carefully.
I'm not much of a cake baker, and most of the cakes I've baked have been from the boxed-mix variety. But these cupcakes are just about as easy to make as opening a box--and way more delicious. Plus there's nothing artificial here.

MAPLE-WALNUT CUPCAKES
Makes 18 cupcakes

2 cups flour
2 tsp baking soda
pinch of salt
3 tbl butter, at room temperature
1/2 cup sugar
1/3 cup brown sugar
2 eggs
1 cup milk
1/4 cup maple syrup
3/4 cup chopped walnuts

Combine flour and baking soda. Set aside.
Cream together butter and sugars in mixing bowl. Add eggs, beating in one at a time. 
Measure milk and syrup into a measuring cup.
Alternate adding milk mixture and flour mixture to batter with mixer on low speed. When batter is beaten well, stir in the chopped walnuts.
Pour batter into prepared cupcake pan.
Bake at 350 for 20 minutes or until cupcakes pass the "toothpick test."

MAPLE-BROWN SUGAR ICING
2 tbl butter
¼ cup brown sugar
1 tbl milk
1 TBL maple syrup
½ cup + 1/3 cup powdered sugar


Melt butter in small saucepan.  Add brown sugar and stir until bubbly.  Remove from heat.  Add milk and syrup and stir until smooth.  Add powdered sugar and beat until frosting is ready to spread.  Use IMMEDIATELY.

Monday, November 11, 2013

Mom's Penicillin

It's a Sick Day for my daughter today, so I've got a pot of homemade chicken-noodle soup simmering on the stove. Chicken soup really does make you feel better--and this is the good stuff right here; nothing artificial added! Chicken soup is also a frugal dish; you can use leftovers to make the stock (it's really easy) and this is a great way to use up those odds and ends of baby carrots and that last bit of the box of pasta.

CHICKEN-NOODLE SOUP

For the soup:
6 cups chicken stock
2 cups carrots, chopped
1 rib celery, finely chopped
1/4 cup onion, finely chopped
parsley (fresh, if you have it--a generous handful)
freshly-ground black pepper
1/4 tsp rosemary

Add-ins:
1 1/2 cups chopped or shredded cooked chicken
1 1/2 cups fettuccine, broken into fourths (less than 1/4 pound)*

Start the soup at least 1 1/2 hours before serving. Simmer, covered. About 1/2 hour before serving, add chicken and pasta and cook uncovered until pasta is done.

*If you prefer to use a smaller noodle such as dilatini, pastina or orzo, 1 cup will be plenty.

Sunday, November 10, 2013

Breakfast Delight: Maple Oatmeal Bread

A friend of ours gave us a bottle of "the good stuff":  real maple syrup from Coombs Family Farms.
I had to act quickly if I was going to get a chance to bake anything with this, as the pancake eaters in the house were making short work of this delicious syrup.

(Coombs, you've completely spoiled my family regarding maple syrup. They've enjoyed the real thing. There's no going back.)

I managed to reserve enough of this maple syrup to add to an oatmeal bread that's great for toasting and has a hint of sweetness--but doesn't go overboard.


For the recipe and nutrition information, please see my new blog, Cook and Count.

The fine print:  recipe and opinions are all mine. I was given no compensation by Coombs Family Farms or any other entity for this post.

Saturday, October 26, 2013

Spicy Corn Chowder in the Slow Cooker

This soup got started as the Corn Chowder recipe from 365 Slow Cooker Suppers. That chowder needed something, so I decided it spice it up with some Ro-Tel (and omitted the potatoes). You can make this chowder as chunky or smooth as you would like, as there's a blender step in the instructions. The more soup you reserve before blending, the chunkier the chowder will be. This freezes well.

For this recipe, including nutrition information, please see my new website at Cook and Count!

Saturday, October 19, 2013

Stuffed and Unstuffed Chocolate-Chip Cookies

Whether your tastes lean toward the super-sweet, the sweet-and-salty, or the traditional, these chocolate-chip cookies are for you! I started out with a basic recipe from Amanda's Cookin' but made a few changes in the prep so the cookies could be stuffed. You can stuff a cookie with all kinds of things, like caramels, pretzels, and mini Oreos. I like to use small items to stuff cookies, so that the cookies themselves don't get TOO big.

My younger son's friend requested a batch of my Oreo-Stuffed Chocolate-Chip Cookies for his birthday, but he wanted a softer cookie. I think this recipe did the trick. After I'd baked 3 pans of cookies stuffed with mini Oreos, I decided to try adding peanut-butter-filled pretzels to a different batch. These new filled pretzels from Utz were just the right size--and they kept their crunchy, salty texture even after baking. Finally, I baked a pan of just plain cookies.

Get the whole recipe with photos and nutrition facts at Cook and Count!

Thursday, October 17, 2013

Review: 365 Slow Cooker Suppers

When it comes to cooking, I'm generally fairly adventurous--except when it comes to using the slow cooker. For as much countertop real estate that my slow cooker takes up, it's definitely underutilized. Mainly, I use it for pot roasts, pulled-meat sandwich fillings, and chili.

Stephanie O'Dea is a lot less cautious than I am when it comes to slow cooking. Besides her website, where I learned to make a mean pork carnitas, she's published several cookbooks that help hesitant cooks like myself get over the idea that there are only a few types of foods that can be prepared in a slow cooker.

Her new cookbook, 365 Slow Cooker Suppers, shows that the possibilities for slow-cooker use are much less limited than most of us think. I marked many recipes I'd like to try, and even made one of them immediately: corn chowder. That's something I really enjoy and something I'd never considered cooking in a slow cooker.

If you read through many of the recipes, you'll discover that there are several variations on a base recipe--just with a different set of seasonings or group of vegetables. Once I noticed that, I felt more confident about fiddling with a recipe on my own to adjust it to my family's tastes--again, something I'll do with a stove-top recipe without thinking twice about it.

One thing I like about O'Dea's cookbooks is the "Verdict" at the bottom of each recipe. In that short paragraph, she explains how the recipe can be varied to suit picky discriminating taste buds as well as what her family liked about each dish.

I felt that there was a lot of emphasis on gluten-free this or that. While I don't mean to slight anyone who must follow a gluten-free diet due to medical necessity, I think there are less-intrusive ways to indicate this in a cookbook. There were recipes that contained the parenthetical "(I use gluten-free insert name of ingredient)" several times. After a while, I started to feel that because I don't have gluten intolerance, I'm not the target market for this cookbook. I doubt that this is what the author intended. I'd suggest, instead, listing gluten-free substitutions at the bottom of a recipe or denoting gluten-free ingredients with a GF icon next to the name of the ingredient. Because most of these recipes don't include a long list of steps to be followed in preparation, there's plenty of room on the page to find another way to indicate when gluten-free ingredients can be used.

The fine print:  I was provided with an electronic copy of this cookbook for the purposes of this review. All opinions are mine alone, and I was given no other compensation for my review.

Tuesday, October 08, 2013

Arroz con Pollo

I like Spanish food, and since yesterday was a feast day with a particularly Spanish connection, this was our dinner last night:

With apologies to every Spanish cook, I took liberties with the Arroz con Pollo. Part of this was because I didn't have some ingredients in the house; part of it was due to personal preference. So it might not have been authentic, but it tasted really good! BONUS:  it's a one-pot meal, so the cleanup was easy.

ARROZ CON POLLO

Get the full recipe and nutrition facts at Cook and Count.

Friday, September 27, 2013

Tomato Pie (and Pizza, too)

It's a Philly thing. I've seen Tomato Pie listed on pizzeria menus (and sitting on bakery shelves) since we moved to the Philadelphia area 22 years ago. But until this summer, I'd never tasted it.

Erin at Mrs. Mackerelsnapper, OP made sure I had a chance to try Tomato Pie at the Catholic Writers Guild Conference this summer, where she served slices of it along with previews of her upcoming novel, Don't You Forget About Me, which is a murder mystery that actually made me cry. Erin likes Tomato Pie so much that she named her blog after it--and it's a key element in that novel as well.

In my household, the divide between Pizza and Tomato Pie follows gender lines. Because I'm essentially lazy, but I wanted to have my Tomato Pie while the guys ate their pizza, I figured out how to make both--with just one recipe--in the oven at the same time, with a little help from Slice. I took their recipe and ran with it, modifying the crust for the bread machine and changing up the sauce a bit. It might not be exactly authentic, but then again, I've had the Real Thing exactly once.

TOMATO PIE (and PIZZA, too)
This recipe makes one 9-inch square tomato pie PLUS one 16-inch round thin-crust pizza.

For the crust:
11 ounces water
2 ounces extra-virgin olive oil
2 tsp salt
3 1/2 cups all-purpose flour
3 TBL vital gluten
1 scant TBL active dry yeast

Place ingredients in the pan of your automatic bread machine in the order recommended by the manufacturer. Use the DOUGH cycle.

For the sauce:
2 TBL extra-virgin olive oil
2 TBL butter
4 garlic cloves, shredded on a microplane
1 TBL dried oregano
1 1/2 tsp dried basil
1 tsp crushed red pepper
1 can (28 ounces) tomato puree
1 small onion, peeled (leave the onion whole)
1 TBL sugar
1 tsp kosher salt

In a heavy saucepan (6-cup or larger), heat the olive oil and butter over medium heat until butter melts. Add garlic, oregano, basil and red pepper and cook 2 minutes until fragrant. Add remaining ingredients. Simmer uncovered, stirring frequently, for at least an hour until the sauce cooks down.

Note:  There will be leftover sauce. Freeze it for the next time, or use it to make french-bread pizza, English-muffin pizza or bagel pizza.

I started the sauce right after getting the bread machine set up. The longer the sauce cooks, the better it will taste.

When the bread machine is done, sprinkle your table with flour and dump the dough on the table. Knead a couple of times, then allow to rest 10 minutes.

Prepare a 16-inch round pizza pan and a 9-inch square cake pan by brushing with olive oil. Place one oven rack fairly close to the bottom and the other one about 2/3 of the way up to the top. Preheat the oven to 450.

Separate about 1/3 of the dough and set aside. This will be for the square pan.

Using a rolling pin, form the larger portion of dough into a circle. When it is almost as large as your pizza pan, roll it partially over the rolling pin, then transfer it to the pizza pan. Use your hands to press it closer to the edge and to form a higher crust at the edges.

Place the smaller portion of dough into the square pan and use your hands to get it all the way into the edges and corners. Form a higher crust at the edges of the pan.

Spread a thin layer of sauce on the round pizza and a thicker coating on the square one.

When the oven has preheated, place the square pan on the higher rack in the oven. Bake for 20 to 25 minutes, until edges are crispy and golden-brown.

Sprinkle any pizza toppings you like on the round pizza. Bake at least 15 minutes on the lower rack, watching carefully (don't let the cheese burn!)

After removing pizzas from oven, allow Tomato Pie to cool slightly, then add a dusting of Parmesano-Reggiano or Romano cheese. Serve at room temperature (it tastes great hot, too, if you can't wait...ask me how I know!)

Tomato Pie would be great for lunchboxes, as it doesn't require reheating.

Tuesday, September 03, 2013

Honey & Lime Fish Fillets

Fish fillets are an easy way to make a Meatless Friday meal. If you purchase individually quick-frozen fish fillets at the supermarket, you'll only need to defrost the fish to make this quick dinner. Fish fillets defrost quickly, so if a visitor shows up in the middle of the afternoon, it's not too late to add another piece of fish to the baking pan. 2-pound bags of IQF fish fillets go on sale regularly at my local supermarket, and for the most part, fish like flounder, tilapia, swai, and whiting can be used interchangeably in recipes like this one.

HONEY-LIME FISH FILLETS

Get this recipe and nutrition facts at Cook and Count!

Friday, August 23, 2013

Garden Marinara Sauce

This sauce is perfect in late summer when there are too many tomatoes around! It will freeze well, and it's great for people who believe there can never be too much garlic in the marinara. I made it with a mixture of red and yellow heirloom tomatoes, but any fresh, ripe tomatoes can be used.

Get the recipe, nutrition information and photos at Cook and Count!

Friday, August 16, 2013

Jersey Fresh Corn & Tomato Salad

Here's a warm salad that uses your garden-fresh corn, tomatoes and herbs. If you don't have any grilled corn, you can bake it in the oven--directions are at the bottom of the recipe.

CORN & TOMATO SALAD

Get the full recipe and nutrition information for this dish at Cook and Count!

Saturday, August 10, 2013

Big Brother's Onion Chicken

I was away this week at a writing conference, and since Middle Sister has been doing a show, it fell to Big Brother to handle the cooking for two nights. He's a good cook, so I just made sure there was food in the house and he took it from there.

On Thursday, we had a long textversation about the oven-worthiness of my favorite skillet. Then, at dinner, I got a text informing me that dinner had been a success.

Obviously he inherited his minimalist style in recipe writing from his great-uncle.

(And I love how he included "eat" in his directions.)

Big Brother says I should try this recipe. I'm going to need a few more details first. And apparently the type of wine is important--Pinot Grigio, not Chardonnay.

I'll update this when I fill in the blanks.

Monday, July 29, 2013

Skillet Chicken Francese

Chicken Francese is one of my favorite chicken dishes, but the recipe I was using called for a saute-then-bake progression that just left me with extra pans to wash. I reworked the process a bit so that no baking was necessary; the results were just what I was looking for!

This is a bit messy as you get it into the pan, but it's definitely worth getting your hands dirty.

SKILLET CHICKEN FRANCESE
(4 servings)

Get the recipe and nutrition information for this dish at Cook and Count!


Monday, July 22, 2013

Gnocchi e Fagioli

Here's a meatless dish that comes together in about 20 minutes! It's easy to make and very heart-healthy. You won't even miss the meat in this simple meal. Add other quick-cooking fresh vegetables to change up the flavor.

GNOCCHI E FAGIOLI
(4 servings)

Visit Cook and Count to get the recipe and nutrition information for this dish!

Monday, July 08, 2013

Sweet and Spicy Asian Chicken

We seem to be on a chili-and-honey kick right now. Let's see how many ways we can use those ingredients on chicken! Tonight's dinner was a variation on a theme:  it's what happens when you realize you were supposed to marinate something just as you get ready to cook it. (Oops.) I think I liked this dish better than the original that inspired it:  Chili Honey Chicken. It cooks quickly; start the rice before you start the chicken!

Visit my new blog, Cook and Count, for this recipe and nutrition information!

Sunday, July 07, 2013

Spicy Honey Chicken

Last night we tried a quick-cooking grilled chicken recipe. With the weather as hot as it was, no one wanted to stand outside near a hot grill for very long, and boneless, skinless chicken breasts cook fast.

The recipe came from Once a Month Mom, a freezer-cooking site. You can season this chicken, freeze it for another day, then thaw, grill and glaze.

I adjusted the quantities of some ingredients, as we ran out of the spice rub before we ran out of chicken, and there was more glaze than we needed. Below is the recipe as I made it.

SPICY HONEY CHICKEN

Get this recipe (with photos and nutrition info) at Cook and Count!

Sunday, June 30, 2013

Chesapeake Bay Shrimp

A shrimp dinner is definitely an extravagance, so I only buy shrimp when it's on sale. I also make the meal stretch by serving lots of vegetables or pasta with it so that no one's tempted to inhale an entire pound of shrimp. If you're buying medium shrimp (51/60 per pound) then a dozen shrimp per person is a good rule of thumb.

One of the standbys in my freezer is a bag or two of individually quick-frozen shrimp. I like to keep both raw and cooked shrimp around for quick dinners. When you use precooked shrimp, as in this recipe, you only need to thaw it, then warm it up. I started the rice, then cut and steamed the broccoli, then got to work on the shrimp--and was still waiting a couple of minutes for the rice to be done.

This was fairly spicy, so if that's a deal-breaker, skip the crushed red pepper.

Get the recipe with photo and nutrition facts at Cook and Count!

Tuesday, June 25, 2013

Oh, SNAP!

I heard about the SNAP challenge on Twitter. Basically, you try to live for a week on a food-stamp budget ($4.50 per person per day.) I'm a bit late to the party, since the national challenge was held between June 13 and 19, but it's interesting to think about. Can you feed a family well on $4.50 per person per day?

That's pretty much what I spend now, though I do have a well-stocked pantry and freezer. I buy groceries on sale, and I don't buy too many prepared foods (except for breakfast cereals, frozen pizza and granola bars.)

That's also pretty much what Big Brother spends on groceries during the school year, when he lives in a college apartment and cooks for himself. Believe me, he eats well:  jambalaya is regularly on the menu--made from scratch. The spice collection he brought home from school this summer is too large for a shoebox that used to hold men's sneakers.

In a Twitter discussion, I was criticized for claiming that the reason I can live on (or close to) a SNAP budget is that I buy ingredients, not prepared foods.

Maya Rupert, a policy director at NCLR, claimed, "but cooking takes much more time & isn't always practical for many low-income families."

My response:  "Understood. But don't sell people short by assuming all they can handle is nutritionally empty prepared foods."

She didn't answer me.

Cooking does take time, but it's faster to cook burgers on your own stove than it is to go to a drive-through, order them, and bring them home. Rice cooks in 20 to 25 minutes. It costs me under $15 to make enough homemade spaghetti sauce and meatballs to feed a family of 5 for 8 dinners. That's less than 40 cents per person per serving. That spaghetti sauce needs to cook a minimum of 4 hours, one time. After that, the sauce and meatballs heat up in the same amount of time as it takes to cook the pasta.

Big Brother learned that staying on a food budget is easier if you plan ahead, eat what's on sale, and shop at Bottom Dollar and ALDI. He doesn't use coupons.

Ingredients are cheaper and healthier than prepared foods, on the whole. Earlier this year I read Kathleen Flinn's The Kitchen Counter Cooking School. The author helped nine "culinary novices" reshape the way they cook and feed their families. The students learned how to prepare foods with fresh ingredients and how to use planned leftovers.

Change doesn't happen overnight, but there's no reason that anyone with even the most basic kitchen equipment (sink, stove, fridge, skillet, 2 saucepans and a colander) couldn't learn to make some homemade, nutritious food rather than reaching for the (high in sodium and sugar) Ragu on pasta night.

Monday, June 10, 2013

Chicken with Tomatoes, Fennel and Basil

This dinner tasted (and smelled) restaurant-quality. It is based on Amanda's Spiced Chicken and Mezzi Rigatoni, with a few changes. Total cook time is 35 to 40 minutes, unless you have an enormous pan to cook the chicken. I had to do the cooking in batches so the chicken would saute instead of steaming.

CHICKEN WITH TOMATOES, FENNEL AND BASIL
Serves 6

Get the recipe and nutrition facts at Cook and Count!

Tuesday, May 07, 2013

Fiesta Chicken Chili: a Blueprint Recipe

I always loved Michele Urvater's "blueprint recipe" concept, in which the basic idea of a recipe is laid out, with variations and suggestions for making it your own. Her Monday to Friday Cookbook inspired me to cook in a more adventurous manner and I eventually gained confidence in creating recipes of my own.

I "invented" this chili as a way to use up some leftover chicken taco meat from a school event. I had about 10 cups of leftover chicken, and I turned it into 10 quarts of chicken chili. I've scaled the recipe down so that it can be made with as little as 2 cups of chicken. It's easy to increase it from there.

Fiesta Chicken Chili

2 cups Fiesta Taco Chicken
1 cup chopped fresh tomatoes
1/2 cup chopped onion
1 can (14 ounces) small red beans, drained and rinsed--or any kind of beans you like
1 cup chicken broth
3/4 cups water
1 1/2 tsp cumin
1 chipotle in adobo, chopped OR 1 tsp chipotle chili seasoning
1 clove garlic, minced

Combine all ingredients in saucepan and simmer, covered, a few hours to allow flavors to mingle. Stir occasionally. I cooked mine in a Nesco roaster at 200 for 5 hours. Cook time is flexible on this recipe, as the chicken is already cooked.

Sunday, April 07, 2013

Cooking by the Numbers

There's an awesome kitchen cheat sheet set to download! It's an excellent resource to keep handy when you're measuring and cooking. Yes, it's in "British" measurement, but so are many recipes! The printable version is available here. I had a picture up before, but it turned my blog all ka-flooey. So we'll stick with just sharing the link. Go get it! Print it! Hang it up in your kitchen!

Saturday, March 23, 2013

Chicken & Onion Paprika

This recipe does not pretend to be authentic in any way, but it was pretty tasty and paired well with the Lithuanian rye bread my husband brought home from the bakery today.

I made it up as I went along; no actual measuring took place--generally I eyeball stuff like this.

Next time I'm adding more onion to this--it was the best part!

CHICKEN & ONION PAPRIKA

1 TBL olive oil
6 chicken thighs, skin-on, bone-in
1 onion, sliced thin
1 heaping TBL minced garlic
1 cup chicken broth
1 can (14 oz) diced tomatoes, or 2 to 3 diced plum tomatoes
1 TBL Hungarian sweet paprika
1/2 tsp smoked paprika
1/2 tsp freshly-ground black pepper
1/2 tsp kosher salt

Heat olive oil in a large heavy skillet. Brown chicken on both sides, then remove from pan and cook onions on high heat until they begin to brown. Lower the heat and add garlic to the pan. Cook 2 minutes, then return chicken to pan and add remaining ingredients. Cover and cook 30 minutes or until chicken is done.

Serve over noodles.

Science-Fair Success!

Although our first shot at a science-fair experiment was by no means a waste, we did have to redo the recipe with the correct proportions of ingredients. That meant we'd have to make more chocolate-chip cookies. (It's a tough job...)

The original cookie recipe came from My Kitchen Escapades. I cut the recipe in half, and we used baking powder in one batch and baking soda in the other. We used the same size cookie scoop, baked for the same amount of time, and measured the cookies after they baked and cooled.

Here's the recipe as Little Brother made it. Today, he had help from a friend who was visiting. I supervised and underwrote the cost of the ingredients. And I'm not letting him know that I'm reporting on his science-fair project here! He has to write his OWN report for school.

SAUCEPAN CHOCOLATE-CHIP COOKIES
(makes about 2 1/2 dozen)

1 stick butter, cut into 8 pieces
1/2 cup brown sugar
1/3 cup sugar
1 egg
1 tsp vanilla
1 1/2 cups flour
1 tsp (baking soda OR baking powder)
1/2 tsp salt
1 cup chocolate chips

1. Melt butter in saucepan.
2. Stir in both kinds of sugar.
3. Let cool 5 minutes.
4. Stir in egg and vanilla.
5. Stir in flour, baking soda OR baking powder, and salt.
6. Make sure dough is cool.
7. Stir in chocolate chips.
8. Measure scoops of dough onto baking sheet.
9. Bake 9 minutes at 350.
10. Allow to cool on pan at least 5 minutes before removing to rack.

The hypothesis was correct! The baking-powder cookies remained tall and puffy, while the baking-soda cookies spread a little more, so they were wider and flatter. Both cookies were delicious; it's just a question of the shape and texture you prefer.

Little Brother measured the cookies after they baked and cooled. The baking-powder cookies averaged 1 inch tall and 1 3/4 inches wide. The baking-soda cookies averaged 1/2-inch tall and 2 1/2 inches wide.

Personally, I preferred the cookies with baking soda. I like a cookie with a crispy outside and chewy inside. The baking-powder cookies were softer and puffier.
The proof is in the cookie!


Friday, March 22, 2013

Kitchen Experiments: Brownie-Chip Cookie Bars

This recipe was born of a science-fair experiment gone wrong, plus a taste-test of a "make-your-own" brownie mix. Put it all together and you get one delicious treat for the chocoholic in your household.

Here's the story behind the mistake:  Little Brother and I were making cookies for his science-fair project. Yes, his science-fair project involves baking cookies! He is testing to see the difference in the finished product when using baking powder versus baking soda. I have him using the Saucepan M&M Cookies from My Kitchen Escapades because the batter is mixed in a saucepan and is very easy to work with. Plus, the cookies come out really good. We think that using baking soda in these cookies instead of the baking powder called for in the recipe will result in a flatter, wider cookie. But that's a story for another day.

I helped Little Brother get all set up in the kitchen, and I was guiding him through the recipe. But it had been a busy day, and I was really tired, and I just wasn't thinking about the fact that 1 stick butter is NOT equal to 1 cup butter. No wonder the batter was a little dry, and hard to mix. The cookies tasted good, though, and I thought they'd be a great base for a combination dessert. The recipe below contains the amount of butter I used in this dessert. If you want the original recipe for cookie-making purposes (and I highly recommend that you try these) then visit My Kitchen Escapades.

COOKIE BASE:
1/2 stick butter, cut into 4 pieces
1/2 cup light brown sugar
1/3 cup sugar
1 egg
1 tsp vanilla

1 1/2 cups flour
1 tsp baking powder
1/4 tsp salt
1 cup chocolate chips

Melt butter in medium saucepan over medium heat. Remove from heat and add both sugars. Stir until smooth and allow to cool for about 5 minutes. Mix in the eggs and vanilla, then add dry ingredients and stir until blended. Wait until batter is completely cool before adding in the chocolate chips.

BROWNIE MIX from Lindsey's Kitchen (this is a great recipe to substitute for boxed brownie mix.)

1 cup sugar
1/2 cup flour
1/3 cup cocoa
1/4 tsp salt
1/4 tsp baking powder
2 eggs
1/2 cup vegetable oil
1 teaspoon vanilla

Mix dry ingredients in large bowl. Add eggs, oil and vanilla and stir until just blended.

MAKE THE BARS:

Preheat oven to 350. Prepare a 9-inch square baking pan (I lined it with Reynolds Release foil.) Pat cookie batter into bottom of pan until the entire bottom of the pan is lined in cookie batter. Pour brownie batter over the top.


Cover the entire cookie layer with brownie batter.
Bake between 28 and 30 minutes. Allow to cool completely, then lift the foil from the pan and place on a cutting board. Cut into squares.


Sunday, March 17, 2013

For St. Patrick's Day: Irish Tea Brack

I like Irish soda bread as much as the next Irish girl, but the recipe I use makes a LOT of soda bread. I tried this recipe today, since I wanted to bake in a smaller quantity. It's based on a recipe from Georgina Campbell's book Classic Irish Recipes (Sterling Publishing, 1992). It is a "soda bread" but unlike the traditional soda bread, the liquid in the recipe comes from tea. Here's the recipe as I made it.

IRISH TEA BRACK

1/2 cup strong black tea
1/3 cup brown sugar
1 1/4 cup raisins
1 TBL orange zest
1 TBL lemon zest
4 TBL butter, melted
1 egg, lightly beaten
2 cups all-purpose flour
1 heaping tsp baking powder
1/4 tsp cinnamon
1 tsp pumpkin pie spice (I used Penzey's Baking Spice instead)
pinch of salt

Mix tea, sugar and raisins in small saucepan and bring to a boil, stirring occasionally. Allow to cool. This can be done well in advance.
Grease a 2-quart round glass baking dish and line the bottom with waxed paper. Preheat oven to 350.
In a mixing bowl, combine tea mixture with citrus zest, butter and egg. Add dry ingredients and stir until mixed. Turn into prepared pan.
Bake 50 minutes or until firm to the touch. A cake tester or toothpick inserted into the middle will come out clean.
Cool in the pan at least 10 minutes before turning it out onto a rack.

Monday, February 25, 2013

Winter Winner: Dutch-Oven Pot Roast

My mom always tells me that she cooks pot roast in beer, but I hadn't tried that myself. And she wasn't home when I was getting ready to start dinner today--so I "winged it." I like how this turned out, and with the onions and braising liquid, you don't need to make gravy.

DUTCH-OVEN POT ROAST with Sweet Onions, Garlic and Yeungling

1 2 1/2- to 3-lb bottom round roast
1 tbl olive oil
3 medium sweet onions, sliced
3 cloves garlic, peeled
pepper
1 bottle (12 oz) Yeungling lager

Use a cast-iron Dutch oven for this dish.
Heat olive oil in Dutch oven and brown roast on all sides. Remove to plate. Add onions and cook a few minutes on high heat. Season roast with pepper and return to Dutch oven. Add garlic and beer. Cover and bake at 350 for 2 hours. Allow to rest 10 minutes before slicing and serving.

Saturday, February 02, 2013

Gnocchi with Cabbage and Shallots: 52 in 52

I'm taste-testing 52 new-to-me fruits and vegetables this year!

5.  Shallots. Every time I'd come across "shallots" as an ingredient in a recipe, I'd substitute onion. But I decided to try shallots instead, as part of this year's 52 in 52. I discovered that onion isn't really a great substitute; shallot has a distinct flavor all its own. It was a little harder to peel than an onion, but the flat side made it easier to chop.

6. Temple Oranges. It's a good time of year for citrus, so I tried Temples. They're deliciously sweet, but annoyingly full of pits. I guess that's why they were labeled "juice" oranges at the store. I saved the zest as well, and froze it to use in a recipe later.

GNOCCHI WITH CABBAGE AND SHALLOTS

This recipe is based on my "Polish" Gnocchi dish, but with more vegetables. This makes 2 to 3 servings.

1 bag (10 ounces) frozen gnocchi
1 1/2 cups cole-slaw mix (shredded cabbage and carrots)
2 shallots, minced
1 clove garlic, minced
1 to 2 TBL olive oil
1/4 tsp rosemary
1/2 tsp freshly-ground pepper
2 TBL Parmesan cheese
1 tsp butter

Prepare gnocchi according to package directions. Drain.
Saute shallots and garlic in olive oil 2 minutes. Add cole-slaw mix and toss to coat. Cover pan and cook 5 minutes until cabbage wilts. Stir in remaining ingredients, tossing until well mixed and butter is melted. Serve immediately.

This makes a great meatless meal if you serve it alongside a green salad.

Monday, January 14, 2013

52 in 52: Black-Eyed Peas and Serrano Peppers

During my second week of "52 in 52," I tried two new vegetables in the same dish! I'm counting them separately because it's my meme, so I get to make the rules here.

3. Black-Eyed Peas. Yummy!
4. Serrano Peppers. I used these in place of the jalapenos in the original recipe. They have similar heat to jalapenos and must be handled in the same way:  wear gloves, discard seeds and don't touch your eyes when working with them!

I loved the recipe I tried; it makes a great lunchtime side dish and will be terrific for picnics. The original recipe is a Paula Deen healthy recipe--that's right, a Paula Deen recipe that contains no butter! I discovered that the vinaigrette is delicious over a green salad as well, and it was really easy to make.

I cut the recipe in half, substituted a serrano pepper for jalapeno, added some red onion and used grape tomatoes because they looked nicer than the sad plum tomatoes at ShopRite. Here it is as I made it:

BLACK-EYED PEA SALAD WITH TOMATOES AND PEPPERS
Makes 3 servings

Vinaigrette:
3 TBL olive oil
2 TBL balsamic vinegar
1 clove garlic, finely chopped
1 tsp sugar
1/4 tsp each salt and pepper

Use a whisk or immersion blender to mix the vinaigrette. Use half for this recipe and the other half for an individual green salad.

Salad:
1 can black-eyed peas, drained and rinsed
1 handful grape tomatoes, cut in quarters
1/2 small red bell pepper, diced
1/2 serrano pepper, seeds removed, chopped finely
1/4 cup red onion, chopped finely
1/4 cup fresh flat-leaf parsley, chopped

Mix all salad ingredients except parsley in a large bowl. Toss with vinaigrette and top with fresh parsley. Serve chilled or at room temperature.

Thursday, January 03, 2013

52 in 52: Apples and Squash

My New Year's Resolution this year is to try to eat more fruits and vegetables. To make it a little more interesting, I thought I'd mix in trying some new-to-me fruits and vegetables. So the goal is to taste-test 52 new varieties of produce by the end of the year--one for each week.

I'll probably be spending a lot of time at Wegman's this year, and I'm posting here for accountability.

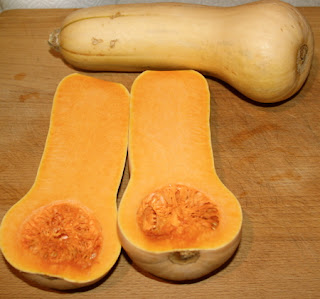
I've already gotten in two new ones, and it's only January 3:  Macoun apples and butternut squash.

Both of them get only 2 stars in the All-Star Produce Lineup. Here's why:

Macoun apples are probably better for baking than eating out-of-hand. They are like a Macintosh apple, with very white flesh, but are kind of sweet and the flesh is not very firm and crunchy. (I prefer Winesap and Granny Smith apples for eating).

Butternut squash deserves another trial, perhaps with a different recipe. I tried it spiced, with garlic, cumin, cinnamon, pepper, brown sugar and olive oil, and roasted. I think there was too much going on in that recipe. Next time I will just roast it with a little butter and a little olive oil and let it caramelize a bit more.

I'm open to suggestions for that butternut squash.

Here's to 52 in 52 and a healthier 2013! (And if I manage to lose 25 pounds this year, so much the better!)

Would you like to join me in this venture? Let's make it a recipe party!

LinkWithin

Related Posts Plugin for WordPress, Blogger...